สวัสดีครับ จากตอนที่แล้ว ที่ผมพูดถึงรายละเอียดต่างๆ ที่จะใช้ในการทำ ระบบเปิด/ปิด ไฟ
ว่าต้องใช้อะไรบ้าง วันนี้ จะมาลงรายละเอียด ในแต่ละส่วนกันครับ ..
อ่านตอนที่ 1 ได้ที่ LINE Bot + node.js + MQTT + ESP32 (IoT) เปิด/ปิด ไฟ (ตอนที่ 1)
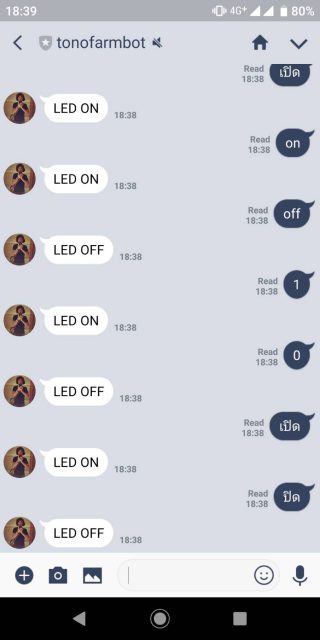
การทำงานคือ ผมจะสามารถสั่ง ให้บอท (LINE Messaging API) สั่งเปิด/ปิดไฟ ได้ผ่าน การ chat ดังภาพ
0.ความรู้ที่ต้องมี ในบทความนี้
– การใช้งาน Arduino IDE เบื้องต้น
– การเขียน node.js เบื้องต้น
– การใช้งาน LINE Messaging API เบื้องต้น
– การใช้งาน Git เบื้องต้น
1.เตรียมอุปกรณ์

สำหรับบอร์ด ESP32 ที่ผมจะใช้ในการทดลองนี้ จะเป็น Node32 Lite นะครับ สามารถหาซื้อได้ที่นี่ครับ ราคา 275 บาท
https://www.gravitechthai.com/product-detail.php?WP=pQugZKpmGQAgG2rDqYyc4Uuw
ปล.หรือถ้าเพื่อนๆ มีบอร์ดอื่นๆ เช่น ESP8266, NodeMCU อยู่แล้ว ก็สามารถใช้งานได้เหมือนกันครับ
2.สมัครใช้บริการ LINE Messaging API
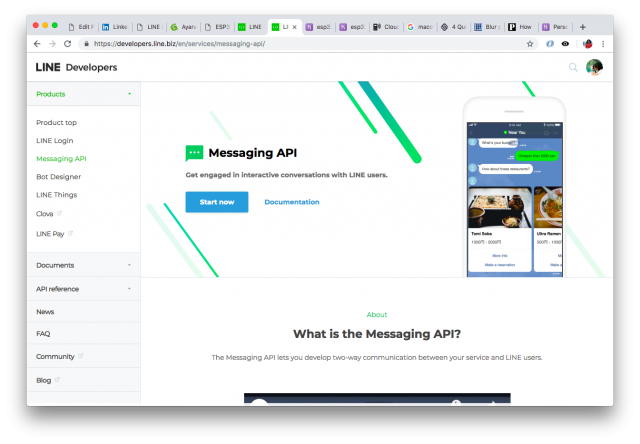
ตรงส่วนวิธีการสมัครใช้งาน LINE Messaging API มีหลายๆ ท่านเขียนบทความไว้แล้ว ตัวอย่างเช่น
LINE Bot 101 — จับมือทำบอท ของคุณ Sitthi Thiammekha (LINE API Expert)
สร้าง LINE Bot ด้วย Node.js + Messaging API — A Beginner’s Guide ของคุณ Ingkwan
3.สมัครใช้บริการ Heroku สำหรับ CloudMQTT Server
เมื่อกรอกรายละเอียดการสมัครเสร็จแล้ว เราจะเข้าสู่ Dashboard ของ Heroku ครับ
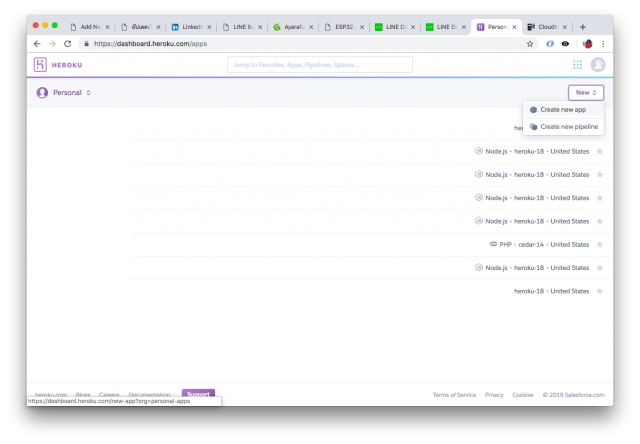
– ที่หน้า Dashboard เลือก New > Create new app
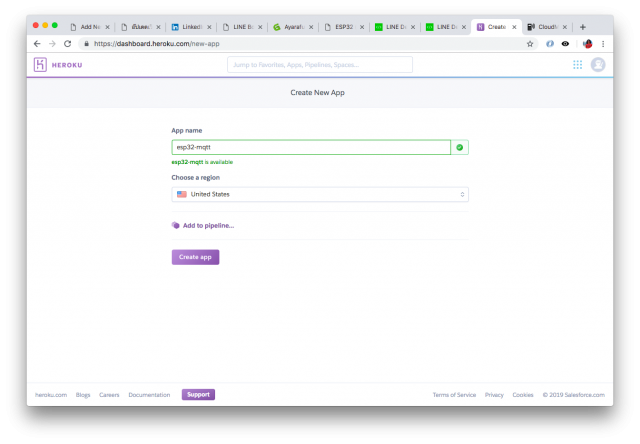
– ตั้งชื่อ App ของเรา ในที่นี้ผมตั้งชื่อ esp32-mqtt
ถ้าสร้างสำเร็จ เราจะเข้าหน้าแรก ของ App เราได้ละ อย่างของผมจะเป็น
https://esp32-mqtt.herokuapp.com/

– ที่ Resources เลือก Find more add-ons
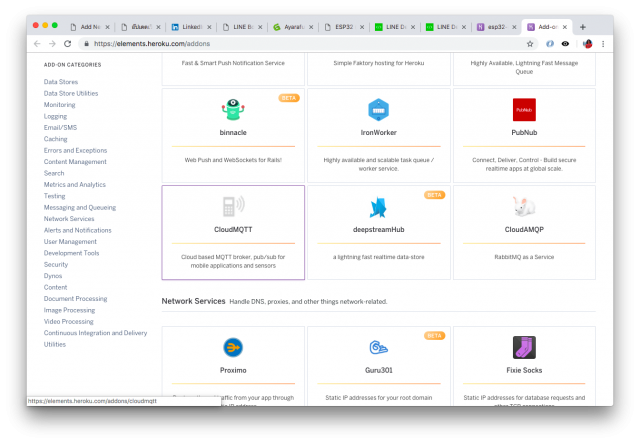
– เลือก CloudMQTT
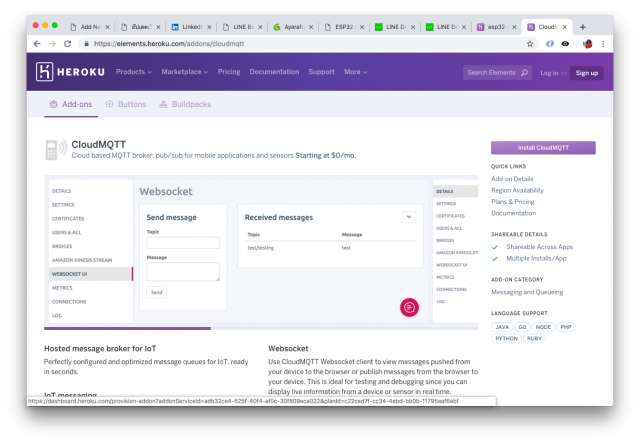
– เลือก Install CloudMQTT
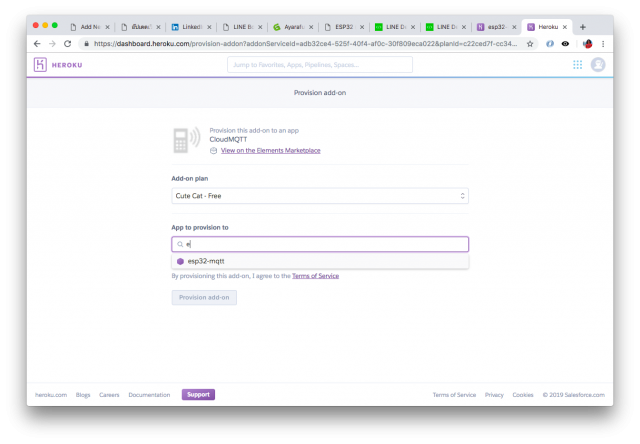
– เลือก App ที่จะ Install CloudMQTT ในที่นี้ ของผมคือ esp32-mqtt
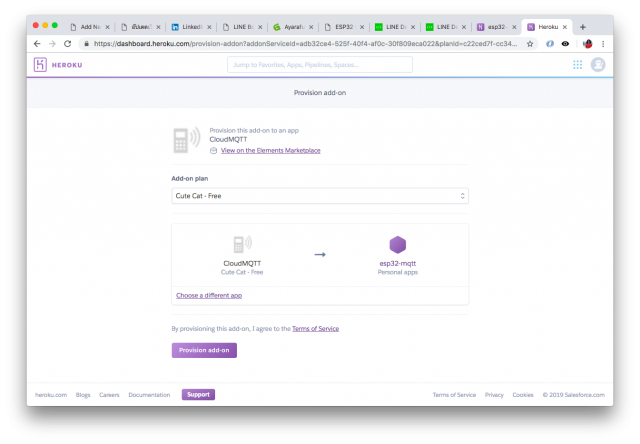
– เลือก Provision add-on
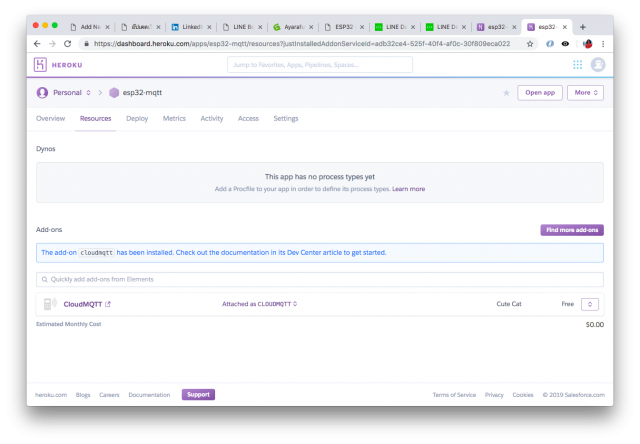
– เสร็จแล้วจะได้ดังนี้ ให้เราคลิกเพื่อดูรายละเอียดของ CloudMQTT ของเราได้ที่ menu ด้านล่าง
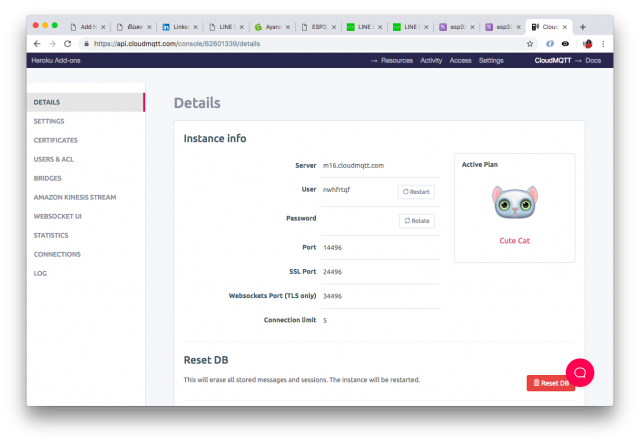
– ค่า config CloudMQTT ตรงนี้ เดี๋ยวเราจะใช้กับ webhook ที่เป็น node.js ของเรานะครับ
4.LINE Bot API Code (node.js)
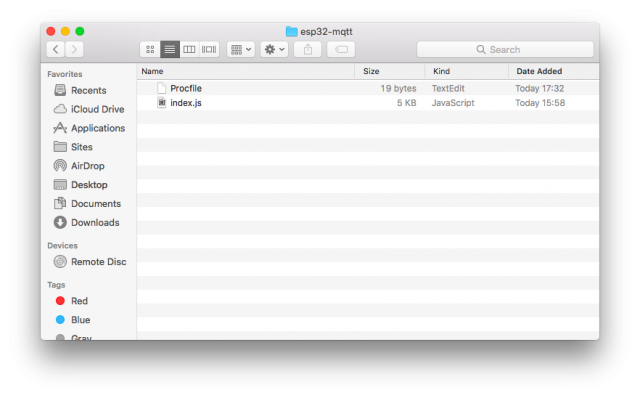
File หลักๆ ที่เราจะใช้ ในการ Deploy ขึ้น Heroku App ของเรา มี 2 file ครับคือ
– Procfile (ไม่ต้องมี .txt) นะ ใช้สำหรับบอกว่า ให้ App เราทำงานแบบไหน เรียก file ไหน
– index.js เป็น file หลัก ของ LINE Bot API เราครับ
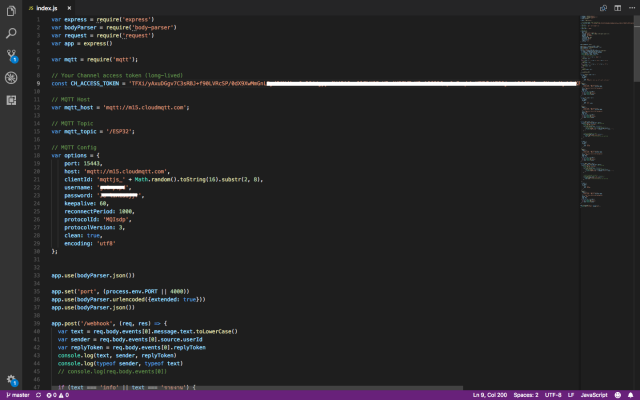
จากนั้น เรามาดูที่ code ที่เป็น LINE Bot API กันครับ
ส่วนที่เราจะต้องแก้ไข หลักๆ มีด้วยกัน 3 จุดครับคือ
– CH_ACCESS_TOKEN คือค่า ยาวๆ ที่เราได้จาก Channel access token (long-lived) ของ Messaging API
– mqtt_host คือค่าที่เราได้จาก CloudMQTT บน Heroku
– options คือค่าต่างๆ ที่เราได้จาก CloudMQTT บน Heroku เช่นกันครับ
Code LINE Bot API ที่เป็น node.js สำหรับ Deploy ขึ้น Heroku ของเราครับ
ใครที่เขียน code คล่องๆ แก้ไข ให้ code สวยงาม กระชับกว่านี้ได้นะครับ อันนี้ผมเขียนแบบด่วนๆ มาก 🙁
Procfile
web: node index.js
index.js
var express = require('express')
var bodyParser = require('body-parser')
var request = require('request')
var app = express()

var mqtt = require('mqtt');

// Your Channel access token (long-lived)
const CH_ACCESS_TOKEN = '';

// MQTT Host
var mqtt_host = 'mqtt://m15.cloudmqtt.com';

// MQTT Topic
var mqtt_topic = '/ESP32';

// MQTT Config
var options = {
    port: 15443,
    host: 'mqtt://m15.cloudmqtt.com',
    clientId: 'mqttjs_' + Math.random().toString(16).substr(2, 8),
    username: 'mqttuser',
    password: 'mqttpass',
    keepalive: 60,
    reconnectPeriod: 1000,
    protocolId: 'MQIsdp',
    protocolVersion: 3,
    clean: true,
    encoding: 'utf8'
};


app.use(bodyParser.json())

app.set('port', (process.env.PORT || 4000))
app.use(bodyParser.urlencoded({extended: true}))
app.use(bodyParser.json())

app.post('/webhook', (req, res) => {
  var text = req.body.events[0].message.text.toLowerCase()
  var sender = req.body.events[0].source.userId
  var replyToken = req.body.events[0].replyToken
  console.log(text, sender, replyToken)
  console.log(typeof sender, typeof text)
  // console.log(req.body.events[0])

  if (text === 'info' || text === 'รายงาน') {
    // Info
    inFo(sender, text)
  }
  else if (text === '1' || text === 'เปิด' || text === 'on') {
    // LED On
    ledOn(sender, text)
  }
  else if (text === '0' || text === 'ปิด' || text === 'off') {
    // LED Off
    ledOff(sender, text)
  }
  else {
    // Other
    sendText(sender, text);
  }

  res.sendStatus(200)
})

function sendText (sender, text) {
  let data = {
    to: sender,
    messages: [
      {
        type: 'text',
        text: 'กรุณาพิมพ์ : info | on | off | เปิด | ปิด เท่านั้น'
      }
    ]
  }
  request({
    headers: {
      'Content-Type': 'application/json',
      'Authorization': 'Bearer '+CH_ACCESS_TOKEN+''
    },
    url: 'https://api.line.me/v2/bot/message/push',
    method: 'POST',
    body: data,
    json: true
  }, function (err, res, body) {
    if (err) console.log('error')
    if (res) console.log('success')
    if (body) console.log(body)
  })
}

function inFo (sender, text) {
  let data = {
    to: sender,
    messages: [
      {
        type: 'text',
        text: 'uid: '+sender
      }
    ]
  }
  request({
    headers: {
      'Content-Type': 'application/json',
      'Authorization': 'Bearer '+CH_ACCESS_TOKEN+''
    },
    url: 'https://api.line.me/v2/bot/message/push',
    method: 'POST',
    body: data,
    json: true
  }, function (err, res, body) {
    if (err) console.log('error')
    if (res) console.log('success')
    if (body) console.log(body)
  })
}


function ledOn (sender, text) {
  var client = mqtt.connect(mqtt_host, options);
  client.on('connect', function() { // When connected
      console.log('MQTT connected');
      // subscribe to a topic
      client.subscribe(mqtt_topic, function() {
          // when a message arrives, do something with it
          client.on('message', function(topic, message, packet) {
              console.log("Received '" + message + "' on '" + topic + "'");
          });
      });


      // publish a message to a topic
      client.publish(mqtt_topic, 'on', function() {
          console.log("Message is published");
          client.end(); // Close the connection when published
      });

  });


  let data = {
    to: sender,
    messages: [
      {
        type: 'text',
        text: 'LED ON'
      }
    ]
  }
  request({
    headers: {
      'Content-Type': 'application/json',
      'Authorization': 'Bearer '+CH_ACCESS_TOKEN+''
    },
    url: 'https://api.line.me/v2/bot/message/push',
    method: 'POST',
    body: data,
    json: true
  }, function (err, res, body) {
    if (err) console.log('error')
    if (res) console.log('success')
    if (body) console.log(body)
  })
}

function ledOff (sender, text) {
  var client = mqtt.connect(mqtt_host, options);
  client.on('connect', function() { // When connected
      console.log('MQTT connected');
      // subscribe to a topic
      client.subscribe(mqtt_topic, function() {
          // when a message arrives, do something with it
          client.on('message', function(topic, message, packet) {
              console.log("Received '" + message + "' on '" + topic + "'");
          });
      });


      // publish a message to a topic
      client.publish(mqtt_topic, 'off', function() {
          console.log("Message is published");
          client.end(); // Close the connection when published
      });

  });

  let data = {
    to: sender,
    messages: [
      {
        type: 'text',
        text: 'LED OFF'
      }
    ]
  }
  request({
    headers: {
      'Content-Type': 'application/json',
      'Authorization': 'Bearer '+CH_ACCESS_TOKEN+''
    },
    url: 'https://api.line.me/v2/bot/message/push',
    method: 'POST',
    body: data,
    json: true
  }, function (err, res, body) {
    if (err) console.log('error')
    if (res) console.log('success')
    if (body) console.log(body)
  })
}

app.listen(app.get('port'), function () {
  console.log('run at port', app.get('port'))
})
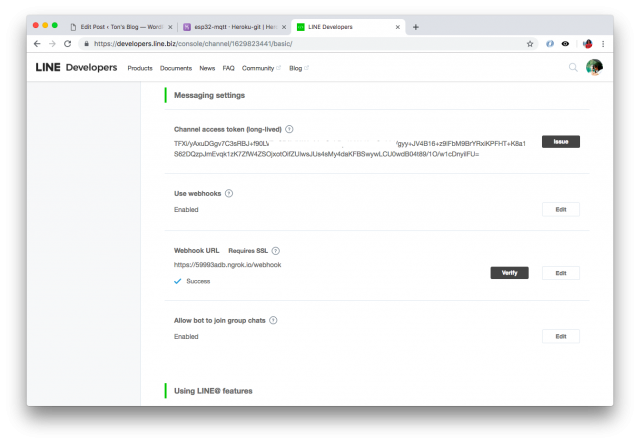
– CH_ACCESS_TOKEN คือค่ายาวๆ ตรงนี้แหละครับ
– mqtt_host กับ options คือค่าที่ได้จาก CloudMQTT ตรงนี้ครับ
5.Deploy Webhook API code ขึ้น Heroku
จาก Step 3 ที่เราสร้าง App ของเราไว้ อย่างของผมจะชื่อ esp32-mqtt ให้เราเข้ามาที่ Deploy
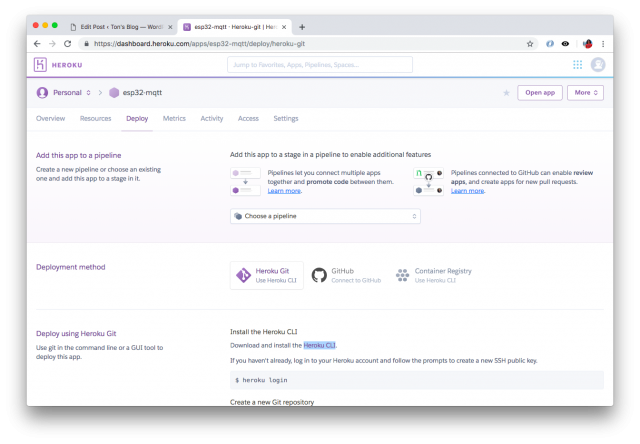
– อันดับแรกเลย ถ้าเรายังไม่เคยใช้ Heroku ให้ Download และ Install Heroku CLI กันก่อนที่
Download and install the Heroku CLI
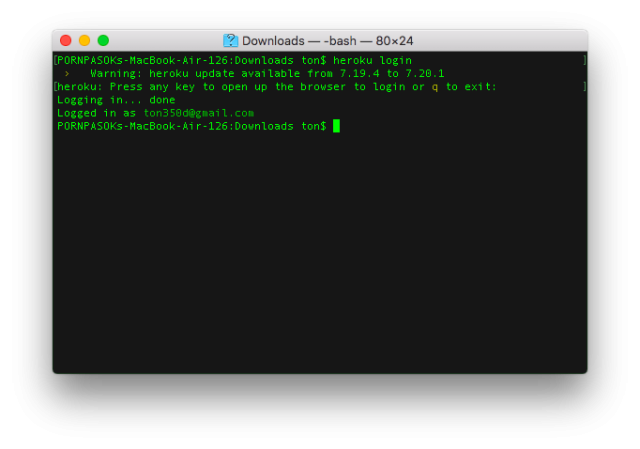
– หลังจากลง Heruku CLI เสร็จแล้ว ที่ Terminal พิมพ์ heroku login
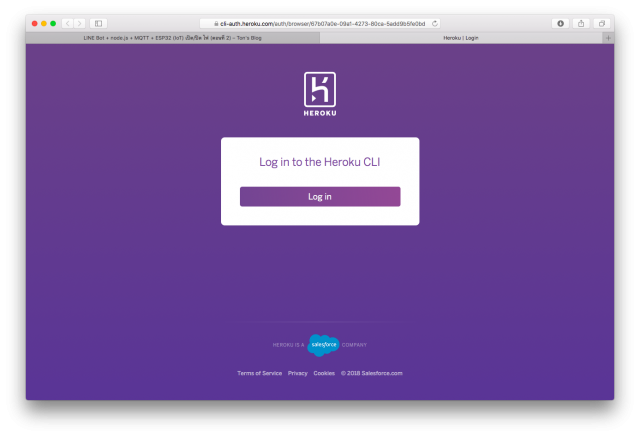
– ตัว Browser จะเด้งหน้า Heroku Login ขึ้นมา ให้เราทำการ Login ให้เรียบร้อย
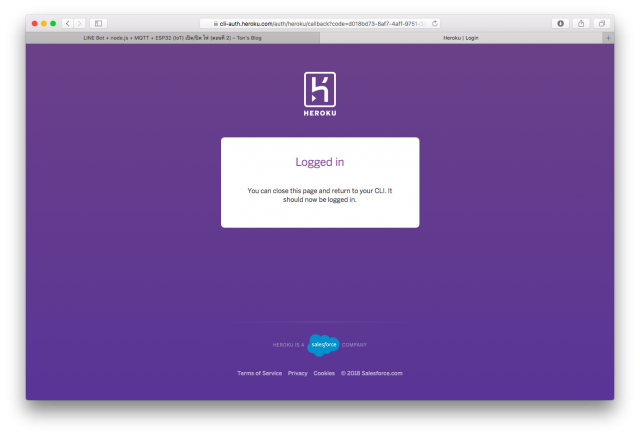
– เมื่อเรา Login สำเร็จแล้ว ก็จะเข้าสู่ขั้นตอนถัดไป ที่ Terminal (CLI)
ทำการสร้าง Git repository
cd my-project/
git init
heroku git:remote -a esp32-mqtt
ทดลอง Deploy
git add .
git commit -am "make it better"
git push heroku master
จากนั้น สร้าง file จาก Step 4 คือ Procfile กับ index.js ที่ Directory ที่สร้างขึ้น อย่างของผมจะเป็น esp32-mqtt
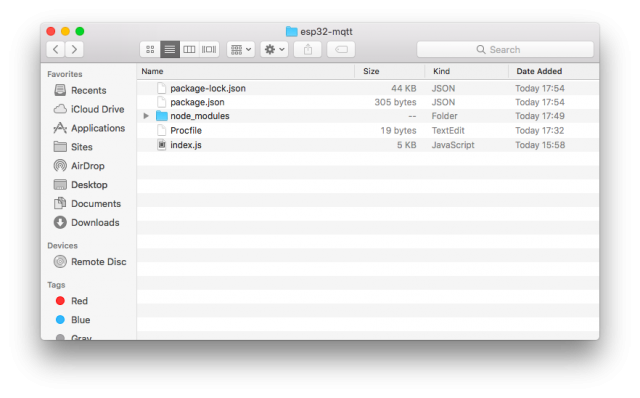
จากนั้น install module ที่จำเป็น ที่เราใช้ในการเขียน App ของเรา ดังนี้
npm init
npm install express --save
npm install request --save
npm install mqtt --save
เราจะได้ file ต่างๆ เพิ่มเข้ามา ใน directory ของเรา
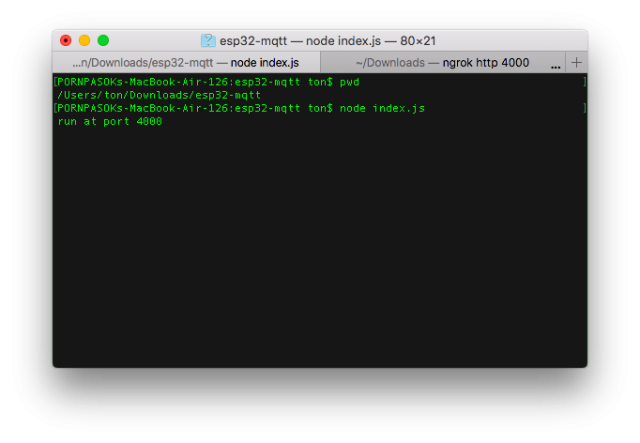
ทดลอง run Wehhook API ที่เราเขียน ด้วย node.js ค่า default จะเป็น port 4000
node index.js
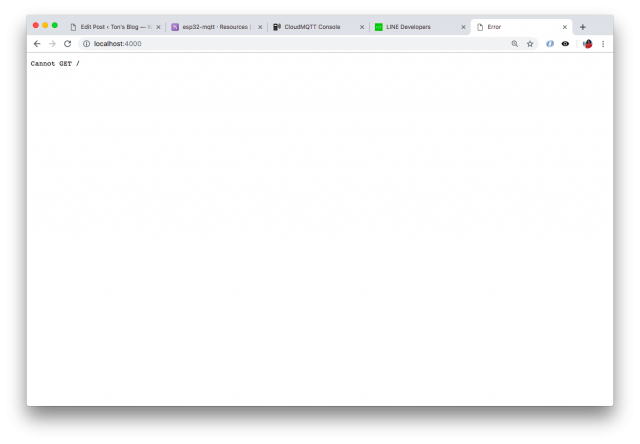
เข้าผ่าน localhost:4000 จะได้ดังรูป Error ไม่เป็นไรครับ ถือว่าทำงานได้แล้ว เพราะเราไม่รับ GET
ทำการ Deploy code จริง ขึ้น Heroku
git add .
git commit -am "add Procfile index.js"
git push heroku master
จากนั้นลองเข้า App ของเราผ่าน URL ที่เราทำการตั้งไว้ อย่างของผมจะเป็น
https://esp32-mqtt.herokuapp.com/
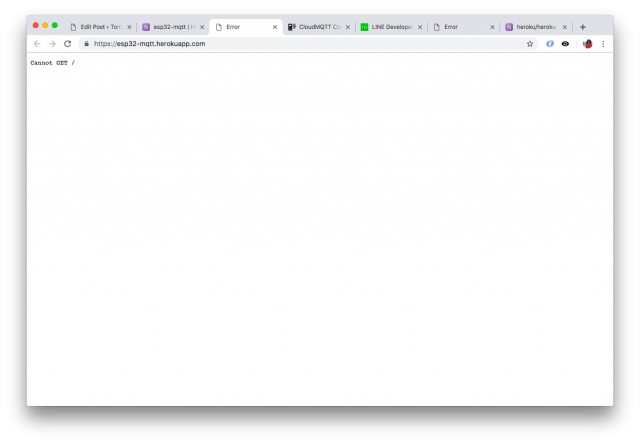
หน้าจะจะได้แบบนี้ ไม่ต้องตกใจครับ เพราะเราไม่รับ GET
แต่ถ้าไม่ได้ ให้เราลองใช้ CLI ดู logs ว่าผิดพลาดตรงไหน
heroku logs --tailเสร็จแล้วครับ LINE Bot API (webhook) ของเรา บน Heroku .. 🙂
6.Config Webhook API ของเราเข้ากับ LINE Messaging API
มาถึงขั้นตอนสุดท้ายในส่วนของ Webhook API ของเรากันแล้วครับ นั่นคือ การผูกกับ LINE Messaging API
– ขั้นตอนแรก เราต้องไป Use webhooks ให้ Enabled แล้ว Save ก่อนนะครับ ตกม้าตาย ตรงนี้กันมาเยอะแล้ว 🙁
– จากนั้น ใส่ URL ของ App เรา ที่ได้จาก Heroku แล้วตามด้วย /webhook ครับ อย่างของผมก็จะเป็น
https://esp32-mqtt.herokuapp.com/webhook
– จากนั้น กด Verify ดูครับ ถ้าไม่มีอะไรผิดพลาด ก็จะ Success ครับ 🙂
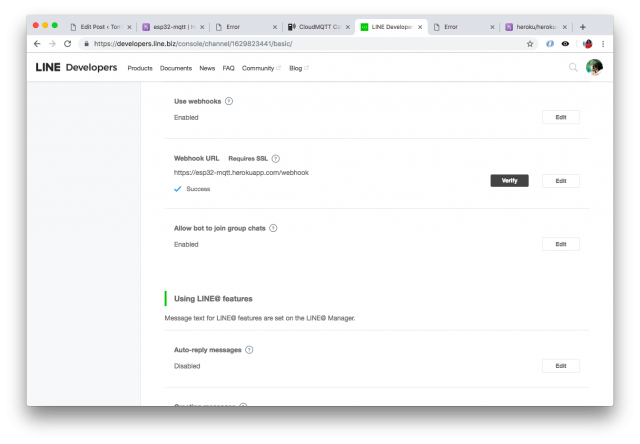
– ประมาณนี้ ก็เป็นอันว่า เรียบร้อยแล้วครับ LINE Messaging API กับ Webhook บน Heroku เราใช้งานได้แล้ว 🙂
7.เขียน code Arduino ให้กับ Node32 Lite
ดูวิธีการติตตั้งบอร์ดใหม่ๆ (Node32 Lite) เข้าไปใน Arduino IDE ได้ที่นี่ครับ
http://www.ayarafun.com/2018/12/how-to-setup-lamloei-32-lite-with-arduino/
เลือกชนิดของ Board ที่เราใช้ให้ถูกต้อง แล้วทำการ Verify และ Upload Code โลดครับ ..
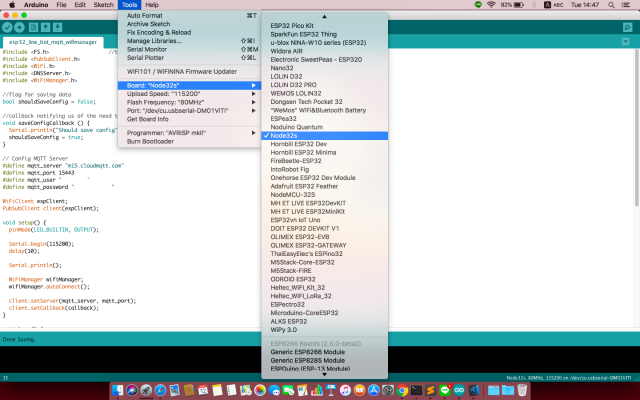
– ในที่นี้ผมใช้บอร์ด Node32 Lite จะต้องเลือกเป็น Node32s รุ่นพี่มันครับ 🙂
ตัว Arduino IDE ให้เราทำการ add Library PubSubClient กับ WiFiManager เข้าไปด้วยครับ
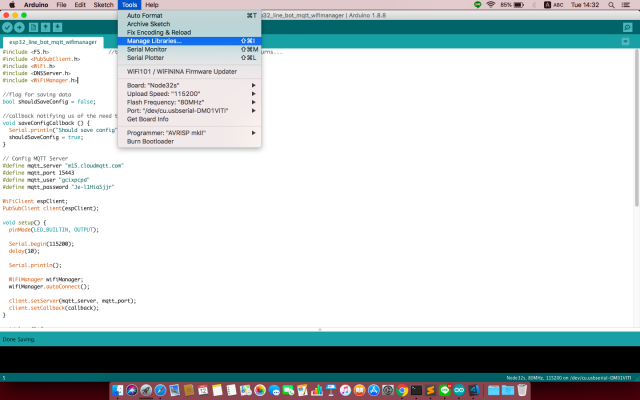
– ไปที่ Tools > Manage Libraries…
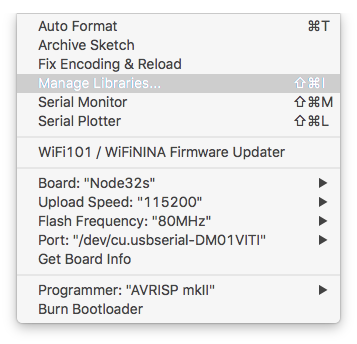
– Manage Libraries…

– Add Lib PubSubClient
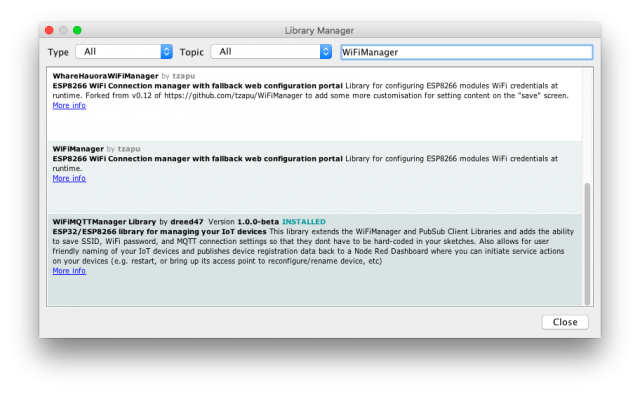
– Add Lib WiFiManager
สำหรับ code จะมี 2 แบบ คือ
แบบ ที่ 1 fix SSID กับ password ไปใน code เลย แบบนี้จะดี ตรงที่เราไม่ต้องมา config ให้บอร์ดเราไปเกาะ WiFi อีกรอบ เหมาะสำหรับการทดลอง หรือใช้ SSID เดิมตลอด ..
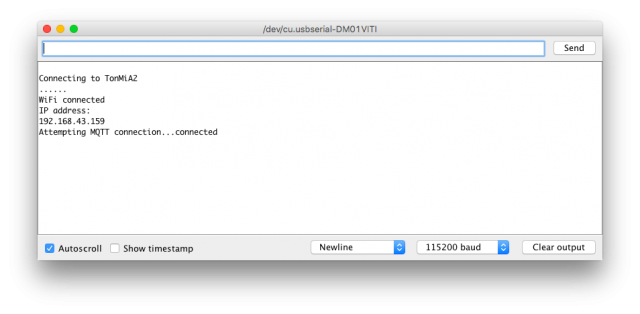
– ถ้าเราดูจาก Serial Monitor จะเห็นรายละเอียดการ connect แบบ fix SSID ดังนี้
แบบ ที่ 2 ใช้ WiFiManager คือจะสามารถ config ให้ Node32 Lite ของเราไปเกาะ SSID (AP) ตัวที่เราต้องการได้ อันนี้จะสะดวก เวลาไปใช้งานจริง ไม่ต้อง Upload code เข้าไปใหม่
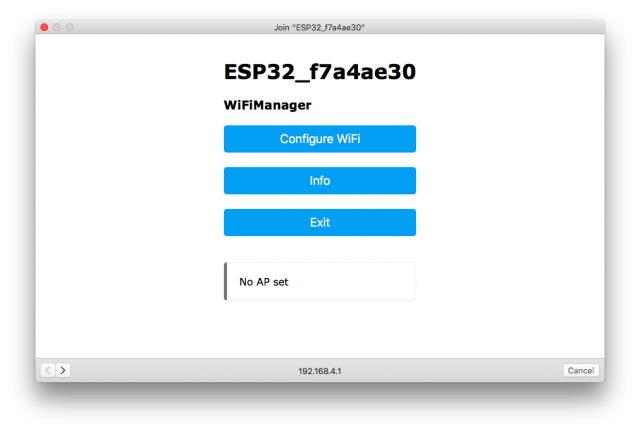
– วิธีการ config ด้วย WiFiManager หลังจาก Upload Code เสร็จ ให้เราไปเกาะ SSID ชื่อ ESP32_xxxxxx จะขึ้นหน้า menu config ดังรูป
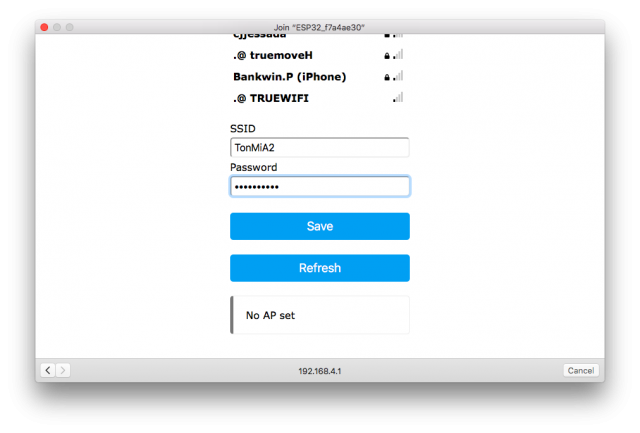
– จากนั้นเลือก SSID(AP) ที่เราต้องการจะให้ไปเกาะ ใส่ password แล้วกด Save
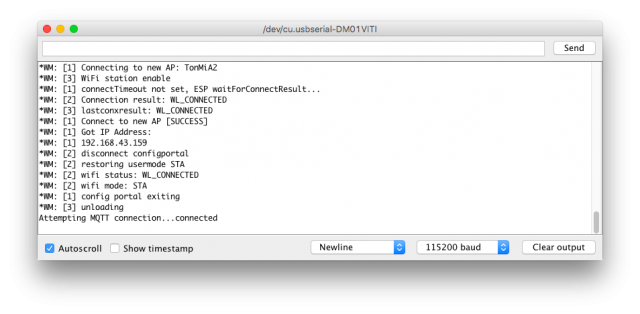
– ถ้าเราดูจาก Serial Monitor จะเห็นรายละเอียดการ connect แบบใช้ WiFiManager ดังนี้
มาดูในส่วนของ Code กันครับ
Code แบบที่ 1 fix SSID กับ password ใน code
#include <PubSubClient.h>
#include <WiFi.h>

// Update these with values suitable for your network.
const char* ssid = "tonofarm.io"; // AP Name
const char* password = "********"; // AP Password

// Config MQTT Server
#define mqtt_server "m15.cloudmqtt.com"
#define mqtt_port 15443
#define mqtt_user "mqttuser"
#define mqtt_password "mqttpass"

WiFiClient espClient;
PubSubClient client(espClient);

void setup() {
  // Set LED_BUILTIN
  pinMode(LED_BUILTIN, OUTPUT);

  Serial.begin(115200);
  delay(10);

  Serial.println();

  Serial.print("Connecting to ");
  Serial.println(ssid);

  WiFi.begin(ssid, password);

  while (WiFi.status() != WL_CONNECTED) {
    delay(500);
    Serial.print(".");
  }

  Serial.println("");
  Serial.println("WiFi connected");
  Serial.println("IP address: ");
  Serial.println(WiFi.localIP());

  client.setServer(mqtt_server, mqtt_port);
  client.setCallback(callback);
}

void loop() {
  if (!client.connected()) {
    Serial.print("Attempting MQTT connection...");
    if (client.connect("ESP32Client", mqtt_user, mqtt_password)) {
      Serial.println("connected");
    } else {
      Serial.print("failed, rc=");
      Serial.print(client.state());
      Serial.println(" try again in 5 seconds");
      delay(5000);
      return;
    }
  } else {
    // MQTT Topic /ESP32
    client.subscribe("/ESP32");
  }
  client.loop();
}

void callback(char* topic, byte* payload, unsigned int length) {
  Serial.print("Message arrived [");
  Serial.print(topic);
  Serial.print("] ");
  String msg = "";
  int i = 0;
  while (i < length) msg += (char)payload[i++];
  Serial.println(msg);
  digitalWrite(LED_BUILTIN, (msg == "on" ? LOW : HIGH));
}
Code แบบที่ 2 ใช้ WiFiManager ในการ config
#include                    //this needs to be first, or it all crashes and burns...
#include
#include
#include
#include

//flag for saving data
bool shouldSaveConfig = false;

//callback notifying us of the need to save config
void saveConfigCallback () {
  Serial.println("Should save config");
  shouldSaveConfig = true;
}

// Config MQTT Server
#define mqtt_server "m15.cloudmqtt.com"
#define mqtt_port 15443
#define mqtt_user "mqttuser"
#define mqtt_password "mqttpass"

WiFiClient espClient;
PubSubClient client(espClient);

void setup() {
  // Set LED_BUILTIN
  pinMode(LED_BUILTIN, OUTPUT);

  Serial.begin(115200);
  delay(10);

  Serial.println();

  WiFiManager wifiManager;
  wifiManager.autoConnect();

  client.setServer(mqtt_server, mqtt_port);
  client.setCallback(callback);
}

void loop() {
  if (!client.connected()) {
    Serial.print("Attempting MQTT connection...");
    if (client.connect("ESP32Client", mqtt_user, mqtt_password)) {
      Serial.println("connected");
    } else {
      Serial.print("failed, rc=");
      Serial.print(client.state());
      Serial.println(" try again in 5 seconds");
      delay(5000);
      return;
    }
  } else {
    // MQTT Topic /ESP32
    client.subscribe("/ESP32");
  }
  client.loop();
}

void callback(char* topic, byte* payload, unsigned int length) {
  Serial.print("Message arrived [");
  Serial.print(topic);
  Serial.print("] ");
  String msg = "";
  int i = 0;
  while (i < length) msg += (char)payload[i++];
  Serial.println(msg);
  digitalWrite(LED_BUILTIN, (msg == "on" ? LOW : HIGH));
}
Source Code ใน GitHub ตามนี้เลยครับ https://github.com/pornpasok/esp32_line_bot_mqtt
8.เรียบร้อยแล้ว ทดสอบใช้งาน
ทำการ Add LINE Bot ของเรา ก่อนนะ จากนั้นทดลองดังนี้ได้เลย
- ถ้าเราพิมพ์ On/on/เปิด/1 ไฟ LED ที่ตัว Node32 Lite ของเราก็จะติดครับ
- ถ้าเราพิมพ์ Off/off/ปิด/0 ไฟ LED ที่ตัว Node32 Lite ของเราก็จะดับครับ
- ถ้าเราพิมพ์ info/รายงาน บอทของเรา ก็จะรายงาน UID ของเราครับ เพื่อเอาไปใช้งานต่อยอดอื่นๆ
ปล. เดี๋ยวพรุ่งนี้ ถ่าย Video มาให้ดูกันนะครับ ว่าการทำงานของมันเป็นยังไง ถ่ายเองกดเอง ไม่ไหว 🙁
Next Step ...
- ต่อกับ Relay เพื่อใช้งานกับอุปกรณ์ไฟฟ้าจริงครับ (อันนี้อันตรายนะครับ ต้องระวังด้วยเพราะเล่นกับไฟ 220v)
- ต่อยอดให้ LINE Bot ของเรา มีความสามารถมากกว่านี้ครับ เช่น monitor หรือรายงาน ค่าต่างๆ ให้เราได้
- ทำ Box ให้ดี ให้สวยงาม กันน้ำ ติด Solar Cells เอาไปใช้งานจริงกันครับ ..
สำหรับท่านใด ที่มีข้อสงสัย หรือไม่เข้าใจตรงส่วนไหน สามารถ Post ถามได้ที่บทความนี้ครับ
หรือ Add LINE ID: pornpasok เข้ามาสอบถามก็ได้ครับ ถ้าตอบได้ผมจะตอบให้นะครับ 🙂