Dell 1950-2950 Debian lenny

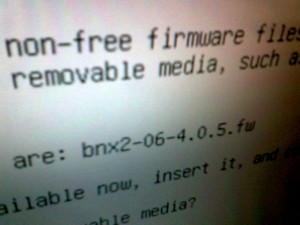
Dell 2950 install Debian missing firmware bnx2

Dell 2950 install Debian missing firmware bnx2

เจอมาหลายรอบแล้วครับกับ Dell PE1950 และ PE2950 สำหรับการ
Install Debian 5.x.x (Lenny) แล้วเจอปัญหา เกี่ยวกับการหา firmware
ของ bnx2 ซึ่งเป็น driver ของ Broadcom NetXtreme II NIC บน 2950
วิธีการแก้ไขก็คือ load firmware มาไว้บน USB stick จากนั้นนำไปเสียบ
ขั้นตอนการ Install จะ scan หาเอง สำหรับ firmware bnx2 หาได้จาก
http://http.us.debian.org/debian/pool/non-free/f/firmware-nonfree/

Virus Trojan iframe php script

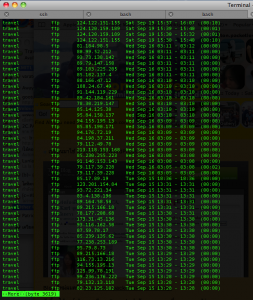
FTP มาจาก IP แปลก ๆ เมืองนอก

FTP มาจาก IP แปลก ๆ เมืองนอก

สวัสดีครับ ไม่ได้มา Update Blog หลายวัน วันนี้จะแก้ไขเว็บ Travel-is.com
แต่ปรากฏว่าเจอ Tag <iframe> .. </iframe> แปลก ๆ ซึ่งเป็นที่ระบาดในตอนนี้
สาเหตุมาจาก Program ที่ใช้ FTP ติด Virus แล้ว Password จะถูกส่งออกไป
ให้ Cracker เพื่อใช้ในการ FTP เข้ามาเปลี่ยน file index.*, main.* ทำให้เว็บเรา
อาจะถูก Google แจ้งเตือนว่าเป็น site อันตราย ไม่เป็นผลดีต่ออันดับในการค้นหา

สำหรับวิธีการหาว่ามีการ FTP จากที่อื่นหรือไม่ ใช้คำสั่ง last | more
ส่วนคำสั่งในการหาว่า file ไหนบ้างติด virus iframe ให้ใช้ find ตามด้วย grep
ดังนี้ครับ find . -type f -name “*.php” -print | xargs grep “iframe” ก็จะรู้ว่า
file ไหนติด iframe ตรงไหน แล้วก็ทำการแก้ไข โดยการลบ iframe พวกนี้ออกไป
แล้วก็อย่าลืมเปลี่ยน Password FTP นะครับ ..

High Scalability

อ่านบทความจาก http://highscalability.com/youtube-architecture แล้วชอบ
ระบบของ Youtube.com มาก ๆ เจ๋งดี ..

Recipe for handling rapid growth

while (true)
{
identify_and_fix_bottlenecks();
drink();
sleep();
notice_new_bottleneck();
}

จริง ๆ ระบบจะใหญ่ได้ ก็คือระบบที่คืนสู่สามัญที่สุด คือ simple มากที่สุด
แต่มีการเพิ่มจำนวนในแบบ flat ได้มากที่สุด พวกระบบใหญ่ ๆ ของโลก
ใช้ server ขนาดเล็ก แต่ใช้จำนวนมาก ช่วยกันทำงาน ทำให้เวลาเครื่องใด
เครื่องนึงมีปัญหา ก็ยังสามารถทำงานต่อไปได้ uptime 100% ..

Mac Network Tools for System Admin

สวัสดีครับ ผมไม่ได้ Update Blog มาหลายวัน เพราะว่าวุ่น ๆ อยู่ครับช่วงนี้
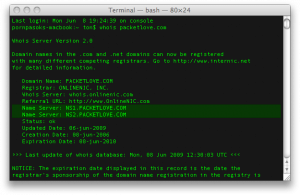
วันนี้เนื่องในโอกาส เข้าสู่ปีที่ 4 ของ PacketLove.com ก็เลยมาเขียนถึง Tools
ต่าง ๆ ที่จำเป็นสำหรับ System Admin ที่เป็นสาวก Apple และใช้ Mac
หลาย ๆ คนต่างพูดกันว่า Mac หาโปรแกรมอะไรลงยาก ไม่เพราะกับงานทางด้าน
Network  และ System Admin ซึ่งในความเป็นจริงแล้วไม่ใช่เลยครับ Mac OS X
เป็น Unix ตัวนึงในตระกูล *BSD แต่จับมาพัฒนาต่อให้มี GUI ที่สวยงาม ใช้ง่าย

Program พื้นฐานที่ควรมีบนเครื่อง ที่ผมใช้ประจำ มีดังต่อไปนี้ครับ

1.Terminal ใช้สำหรับ ssh เครื่อง Unix ทั่ว ๆ ไปครับ จะมีมากับ OS X อยู่แล้ว
ถ้าใครที่ต้องการความสามารถเพิ่มเติม อาจจะไปหา iTerminal มาลงก็ได้ครับ
Terminal Mac OS X

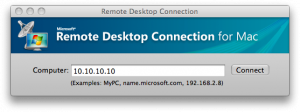
2.Remote Desktop Connection (RDC) สำหรับ System Admin M$ Windows
Remote Desktop Connection Mac OS X

ส่วนการเชื่อมต่อนั้น หลาย ๆ ที่ต้องใช้ VPN (Virtual Private Network)
ซึ่ง VPN ก็มีหลายประเภทด้วยกัน เช่น IPsec, SSL/TSL, L2TP และอื่น ๆ
ซึ่งแต่ละอย่างก็เหมาะสมกันไปในแต่ละงาน ถ้าเป็นพวก L2TP บน OS X
ไม่ต้องลง Program อะไรเพิ่ม สามารถ Config ใช้งานได้เลย แต่ถ้าเป็นตัวอื่น
เช่นพวก IPsec หรือ SSL/TSL ต้องลง Program เสริมช่วยในการใช้งาน
ที่ Free และมีประสิทธิภาพและสามารถใช้งานได้ดี ที่ผมใช้งานคือ 

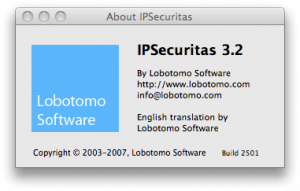
1.IPSecuritas ตัวนี้มีความสามารถหลากหลาย ใช้ได้กับหลาย IPsec เช่น
Netscreen, Cisco VPN และอื่น ๆ แต่บางตัวอาจจะต้องเลือกค่า Config 
ให้ตรงกับการ Set ของ VPN Server
IPSecuritas IPsec VPN Mac OS X

2.Tunnelblick VPN ตัวนี้ใช้สำหรับ SSL/TSL VPN ซึ่งมีอยู่มากมาย
หลายยี่ห้อ เช่น Astaro, OpenVPN และอื่น ๆ
Tunnelblick VPN Mac OS X


จะเห็นว่าบน Mac มี Tools ต่าง ๆ ให้เราใช้งานกันมากมาย ไม่ว่าจะทำงาน
สาขาอาชีพอะไรก็ตาม อย่าไปฟังเสียงบ่นที่ว่า Mac ใช้งานยาก ต้องลอง
มาสัมผัส มาใช้งานจริง ๆ ครับ แล้วท่านจะหลงรัก Mac อย่างแน่นอน ..

MySQL SphinxSE and PHP Sphinx Extension

Sphinx a full-text search engine

ตอนนี้ Server นิ่งแล้ว ก็เลยมีเวลามาทำ R&D เกี่ยวกับระบบ Search
เพื่่อนตั้ม (http://www.thaiajax.com) โปเกม่อนเทพ แนะนำ
ว่าให้เอา Sphinx มาช่วย ก็เลยต้องเป็นหน้าที่ผม ที่ต้องทำ Server
ให้ Support หาข้อมูลได้น้อยมากเกี่ยวกับตัว Sphinx ยิ่งในไทย
เท่าที่เห็น ยังไม่มีเลย เพราะคงไม่ต้องใช้ถึงขนาดนี้ ระบบไม่ใหญ่ ..
นั่งงมอยู่นานเหมือนกัน เพราะไม่เคยใช้ หาอ่าน Doc ของเว็บ Sphinx
ก็มีให้อ่านน้อยมาก ๆ แต่เว็บอื่น ๆ มีอยู่พอสมควร ..

ตอนนี้เรื่องการใช้งานการปรับแต่งอะไร ก็กำลัง test กันอยู่ ผมเอา
วิธีการ config มาให้เพื่อน ๆ ที่สนใจได้อ่านกันละกัน เพราะว่ากว่าที่
ผมจะ config ได้ ก็ใช้เวลาพอสมควรเหมือนกัน เลยเอามาแบ่งปัน ..

Install MySQL SphinxSE CentOS 5.2

yum -y install bison patch automake libtool

wget http://www.sphinxsearch.com/downloads/sphinx-0.9.8.tar.gz
wget http://dev.mysql.com/get/Downloads/MySQL-5.0/mysql-5.0.67.tar.gz/from/http://mysql.thaiweb.net/
tar xfz sphinx*
tar xfz mysql*

cd mysql*
patch -p1 < ../sphinx-0.9.8/mysqlse/sphinx.5.0.37.diff
BUILD/autorun.sh
mkdir sql/sphinx
cp ../sphinx-0.9.8/mysqlse/* sql/sphinx
./configure –prefix=/usr/local/mysql –with-sphinx-storage-engine
make
make install

cp support-files/mysql.server /etc/init.d/
/etc/init.d/mysql.server start

mysql> SHOW ENGINES;
+————+———+—————————————————————-+
| Engine | Support | Comment |
+————+———+—————————————————————-+
| MyISAM | DEFAULT | Default engine as of MySQL 3.23 with great performance |
| MEMORY | YES | Hash based, stored in memory, useful for temporary tables |
| InnoDB | YES | Supports transactions, row-level locking, and foreign keys |
| BerkeleyDB | NO | Supports transactions and page-level locking |
| BLACKHOLE | NO | /dev/null storage engine (anything you write to it disappears) |
| EXAMPLE | NO | Example storage engine |
| ARCHIVE | NO | Archive storage engine |
| CSV | NO | CSV storage engine |
| SPHINX | YES | Sphinx storage engine 0.9.8 |
| ndbcluster | NO | Clustered, fault-tolerant, memory-based tables |
| FEDERATED | NO | Federated MySQL storage engine |
| MRG_MYISAM | YES | Collection of identical MyISAM tables |
| ISAM | NO | Obsolete storage engine |
+————+———+—————————————————————-+
13 rows in set (0.00 sec)

Install Sphinx

cd ../sphinx*
./configure --prefix=/usr/local/sphinx --with-mysql
make
make install

cd api/libsphinxclient
chmod +x buildconf.sh
./buildconf.sh
./configure
make
make install

Install PHP Sphinx extension
http://pecl.php.net/package/sphinx


cd ../../../
wget http://th.php.net/get/php-5.2.6.tar.gz/from/this/mirror
wget http://pecl.php.net/get/sphinx-0.2.0.tgz

tar xfz php-5.2.6.tar.gz
tar xfz sphinx-0.2.0.tgz
mv sphinx-0.2.0 php-5.2.6/ext/sphinx
rm configure
./buildconf –force
./configure –with-apxs2=/usr/local/apache/bin/apxs –with-mysql=/usr/local/mysql –enable-force-cgi-redirect –with-gettext –with-zlib-dir=/usr/local/zlib –enable-mbstring –with-curl=/usr/local/lib –with-sphinx
make
make install

ทำนี้ก็เป็นอันเรียบร้อยแล้วครับ สำหรับ MySQL+SphinxSE
และ PHP Sphinx Extension

rsync FreeBSD debian auto backup

วันนี้น้องตั้ม แห่ง http://www.ohozaa.com มาคุยเรื่อง Backup Server
ที่มีจำนวน file ประมาณ 150GB ว่าจะใช้วิธีไหนดี เท่าที่ผมใช้ และคิดว่าเหมาะสม
ที่สุด ก็คือ rsync เพราะมีความรวดเร็ว และไม่ต้องเอา file เก่า ๆ มาทั้งหมด เอาแต่
file ที่มีการเปลี่ยนแปลงมา ดังนั้น ยิ่งเรา sync กันบ่อยเท่าไร file ครั้งต่อไป ก็ยิ่ง
จะมีข้อมูลที่ต้อง sync น้อยลง และใช้เวลาน้อยลง แต่เวลาที่เหมาะสม ก็คือเวลา
ที่ server ทำงานเบาที่สุด มี idle มากที่สุด วันละครั้งก็เพียงพอ ..

ผมเคยเขียนบทความเรื่อง rsync ไว้ครั้งหนึ่งแล้ว แต่เขียนเป็น English เพื่อที่จะได้
ให้คนอื่น ๆ ทั่วโลก อ่านได้เข้าใจ เวลา search จะได้เจอ ข้อมูลที่ต้องการ แต่วันนี้
จะขอเขียนแบบ version ไทย ๆ อ่านง่าย ๆ เป็น step ที่เข้าใจง่าย ๆ ไปประยุกต์ใช้
กับงานของตัวเองกันให้เหมาะสม อย่าลืมนะครับ การ backup เป็นสิ่งที่ละเลยไม่ได้ ..

ในที่นี้ผมจะขอยกตัวอย่า่งการทำ rsync กันระหว่างเครื่องที่เป็น FreeBSD และ Debian
นะครับ สามารถไปประยุกต์ใช้ ระหว่าง OS Unix ตัวอื่นได้เหมือนกัน .. เริ่มกันเลยครับ

ฝั่ง Server

Step 1: Install rsync
freebsd-1# cd /usr/ports/net/rsync
freebsd-1# make install clean

Step 2: Config rsyncd.conf
freebsd-1# vi /usr/local/etc/rsyncd.conf
ใส่ข้อมูลไปดังนี้ครับ
[www]
comment = web server backup
path = /home/ton # ตรงนี้เป็น path ของ server ที่เราต้องการ backup
auth users = ton # user ที่ใช้ในการ Authen
uid = ton
gid = ton
secrets file = /usr/local/etc/rsyncd.secrets # ที่เก็บ file สำหรับเก็บ user-passwd
read only = no

Step 3: Create rsyncd.secrets
freebsd-1# vi /usr/local/etc/rsyncd.secrets
ใส่
ton:123456
freebsd-1# chmod 600 /usr/local/etc/rsyncd.secrets

Step 4: Edit rc.conf
freebsd-1# vi /etc/rc.conf
ใส่
rsyncd_enable=”YES”

Step 5: Start Rsync daemon
freebsd-1# /usr/local/etc/rc.d/rsyncd start

Step 6: Rsync daemon ลองดูว่ามี daemon ประมาณนี้หรือยัง
freebsd-1# sockstat | grep rsync
root rsync 60398 3 dgram -> /var/run/logpriv
root rsync 60398 4 tcp6 *:873 *:*
root rsync 60398 5 tcp4 *:873 *:*

ถ้ามีก็เป็นอันเรียบร้อยแล้วครับสำหรับฝั่ง Server ของเรา

ฝั่ง Client

Step 1: Install rsync
debian-client# apt-get install rsync

Step 2: Test rsync
debian-client# rsync -avz -e ssh ton@server1.example.com:/home/ton/ /home/ton/

Step 3: Create The Keys On mirror.example.com
debian-client# mkdir /root/rsync
debian-client# ssh-keygen -t dsa -b 1024 -f /root/rsync/mirror-rsync-key

Generating public/private dsa key pair.
Enter passphrase (empty for no passphrase):
<– Enter

Enter same passphrase again:
Your identification has been saved in /root/rsync/mirror-rsync-key.
Your public key has been saved in /root/rsync/mirror-rsync-key.pub.
The key fingerprint is:
6c:34:c9:29:cf:16:a3:c8:72:c0:28:b3:c6:61:75:a2 root@www
<– Enter

Step 4: Copy our public key to server1.example.com:
debian-client# scp /root/rsync/mirror-rsync-key.pub ton@server1.example.com:/home/ton/

กลับมาดูที่ฝั่ง Server อีกครั้งครับ

Step 7: Create authorized_keys
(Login as ton!)
freebsd-1# mkdir ~/.ssh
freebsd-1# chmod 700 ~/.ssh
freebsd-1# mv ~/mirror-rsync-key.pub ~/.ssh/
freebsd-1# cd ~/.ssh
freebsd-1# touch authorized_keys
freebsd-1# chmod 600 authorized_keys
freebsd-1# cat mirror-rsync-key.pub >> authorized_keys

Step 8: Connect from mirror.example.com only
(Still as ton!)
freebsd-1# vi /home/someuser/.ssh/authorized_keys
ใส่ เข้าไปก่อนข้อความใน file เดิม
command=”/home/ton/rsync/checkrsync”,from=”mirror.example.com”,no-port-forwardin
g,no-X11-forwarding,no-pty

ตอนนี้ก็เป็นอันเสร็จแล้วครับสำหรับฝั่ง Server เราจะสามารถใช้ rsync ผ่าน sshd ได้
โดยไม่ต้องใส่ user – password ทำให้สะดวกขึ้นเวลาทำ auto backup

มาดูที่ฝั่ง Client กันอีกครั้งครับ

Step 5: Test rsync
debian-client# rsync -avz –delete -e “ssh -i /root/rsync/mirror-rsync-key”
ton@server1.example.com:/home/ton/ /home/ton/

Step 6: Create crond job
debian-client# crontab -e
ใส่
*/5 * * * * /usr/bin/rsync -azq –delete -e “ssh -i /root/rsync/mirror-rsync-key”
ton@server1.example.com:/home/ton/ /home/ton/

ก็เสร็จแล้วครับสำหรับการทำ rsync ระหว่าง FreeBSD กับ debian